


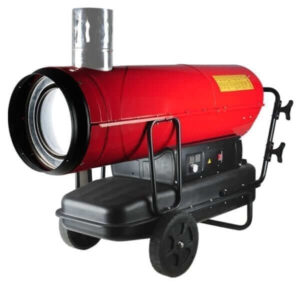


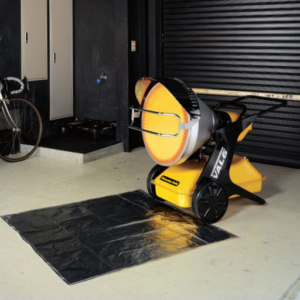


MAINTENANCE SCHEDULE FOR THE IDH2 RANGE
INDUSTRIAL DIESEL HEATERS
Download the Maintenance Schedule & Logbook
For Your Information
Due to poor quality diesel available in some regions in Australia and the continuous ‘winter diesel problems’ we face each year such as ‘wax crystallising’, which can lead to fuel line blockages etc, regular maintenance and adhering to our strict guidelines which include storing & preventative wax crystallising options is highly recommended to ensure the best performance and longevity of our Diesel Heaters.
All diesel fuel contains wax. It is considered an important diesel component because of its high cetane value. Normally the wax is a liquid in the fuel, however, when diesel fuel gets cold enough the wax starts to crystallise (i.e. solidify). If the temperature is sufficiently low, enough crystals will form to block the fuel filter, fuel line or nozzle.
It is recommended a qualified service center or persons complete any maintenance & servicing works. However the above recommended maintenance schedule can be completed by the end user.
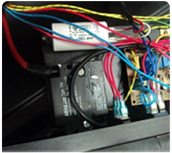
Any electrical works must be completed by a qualified person only. No electrical components or parts are to be serviced or removed by the end user. If the plug or lead is damaged do not replace, contact Fanmaster or have a qualified persons complete the work.
If claiming under warranty please contact Fanmaster or where you purchased the heater from first. The logbook must be completed and supplied when claiming under warranty.
How to identify waxing problems
- If wax has formed in a diesel fuel then it will block fuel lines and filters, it is visible as a white/yellow deposit or cloud in the fuel.
- The heater will be hard to start or will not start due to fuel starvation
Recommended Maintenance Schedule
- High frequent use, colder regions or dusty/dirty environments will need to be checked on a more regular basis.
- When cleaning fuel lines, fuel filters, fuel nozzle it is recommended to rinse or soak in diesel or kerosene. If using water please ensure the parts are completely dry before re-installing.
- After use do not leave your heater out in the cold, store away inside and cover it with a tarp or blanket (after its cooled down). This will assist in melting the fuel in the fuel lines and prevent any blockages.
- After winter or for long periods of non use do not leave any diesel fuel in the tnak, use it all up or drain the tank.
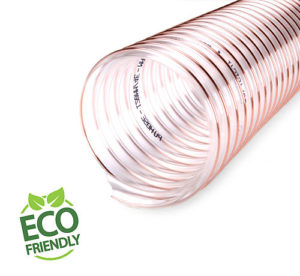
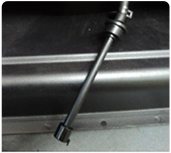
Fuel Line
Once a month
Blockages or Cracks
Minimum once a year
Fuel Nozzle
Once a month
Blockages. Clean or Replace
Minimum once a year
Fuel Filter - Intake
Twice a month
Blockages. Clean or Replace
Minimum once a year
Fuel Filter - Tank
Twice a month
Blockages. Clean or Replace
Minimum once a year
Fuel Tank
Once a year
Dirt. Drain fuel tank & flush it using clean fuel
N/A
Air Lines
Once every 3 months
Cracks
Minimum once a year
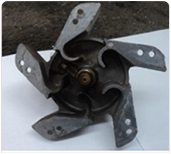
Air Pump (Core Body)
Once every 3 months
Dust/Dirt, Broken core body or blades
As required
Air Pump Folters
Once a month
Dust/Dirt, Blockages
As required
Air Pump Pressure
Once a month
Red exit cone with NO flame exiting heater
N/A
Photocell
Once a month
Dust/Dirt. Clean with dry cloth/tissue
As required
Blending Diesel
If you are in low temperature regions such as Alpine/highland/inland or unseasonably cold weather, a diesel blend with kerosene may provide some relief to lower the cloud point.
IDH2-20
19
18
1
IDH2-30
38
36
1.5
IDH2-50
56
53
3
Components Brief
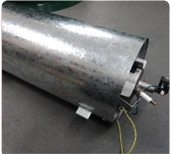
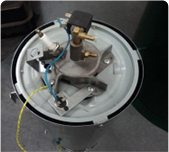

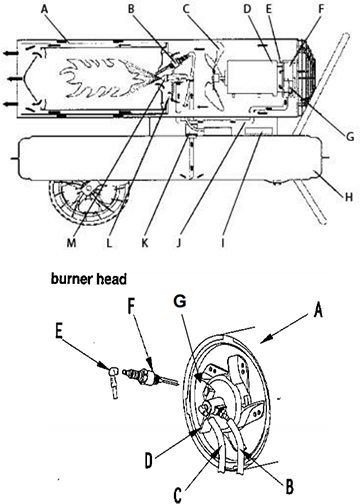

Legend Details
- A. Combustion chamber
- B. Spark plug
- C. Fan blade
- D. Motor
- E. Electric air pump
- F. Air intake filter
- G. Air output filter
- H. Fuel tank
- I. Control board
- J. Air line
- K. Fuel filter
- L. Flame steady plate
- M. Fuel nozzle
Instructions
Please ensure the heater is turned off and unplugged from the power source before doing any service work.

Fuel Line & Fuel Filter
- Remove top cover – undo 10 screws
- Remove side cover (not switch side)
- Remove clips securing fuel line to adaptor plate & fuel filter
- Remove fuel line, check for cracks around where the clips go or where the line passes through the body & check for waxing, If cracks or waxing is found replace line
- Pull fuel filter up and out of tank, check & make sure filter is clean & clear
- Reassemble following steps 1-6 in reverse

Airline
- Remove top cover – undo 10 screws
- Remove side cover (not switch side)
- Remove rear grill
- Remove clips holding air line to motor and adaptor plate
- Remove air line, check for cracks around where the clips go or where the line passes through the body, if cracks found replace
- Reassemble following steps 1-6 in reverse

Magic Eye Sensor
- Remove top cover – undo 10 screws
- Pull magic eye out located besides spark plug
- Using either tissue paper, soft cloth or cotton bud, gently clean the sensor inside the plug
- Reassemble following steps 1-3 in reverse